Have just spent half of Easter weekend making these amazing little spiders with eyes that blink! The idea came from Ken Murphy and I have adapted a few bits – check out his website for more maker projects.
What is a Blinkybug?
Blinkybugs are simple little electro-mechanical insects that respond to movement, wind, and vibrations by blinking their LED (light-emitting diode) eyes. Despite their simplicity, they have a strangely lifelike quality. I think dextrous 10-11 yr olds could make these – they are a bit fiddly and there is a fair bit of trial and error at the end but Hey! – that’s what ‘making’ is all about.
What you need to make a bug
- 2 LEDs for the eyes – any colour you like
- a short length of piano wire (I used the thinest guitar string)
- a watch battery
- a couple of pipe cleaner (the coloured or sparkly ones are best but if you can only get white ones then you can colour it with a felt pen)
- copper tube – I bought 2mm from ebay at 1.89€ for enough to make about 10!)
- a few glue dots (or you could use a hot glue gun but I could do a lot of damage with one of those)
(incidentally, this scales up very easily for a class – I spent about 20.0 € and had enough for 50 or 60)
Tools you need
- Scissors
- Needle-nose pliers
- Wire cutters
- Sellotape
- Permanent marker
- Ruler
Step 1: Making the eyes
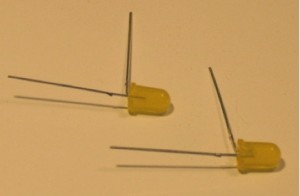 Take one of the LED and bend the positive lead so that it is at right angles to the other one (The long lead is the “positive” lead… this is important, as LEDs need to be oriented the right way, or they don’t work!) Then do the same for the other one. They should now look like this:
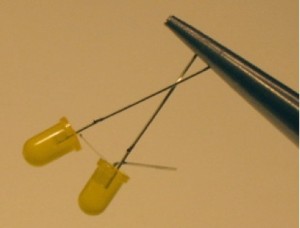 Next, you want to twist the 2 shorter (negative) leads of the LEDs together. With the LEDs pointing in the same direction and the positive leads parallel to each other, cross the ends of the two negative leads using a pliers.
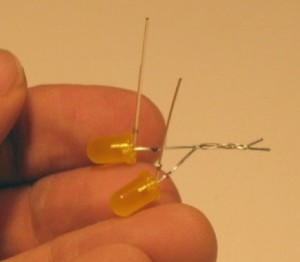 Then using the pliers or your fingers give the leads about 3 or 4 twists. The results should look something like this:
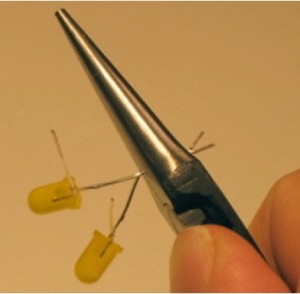 If the twisted wires are a bit loose or bumpy, just give the twist a good squeeze with the wide end of the pliers and squash them flat.
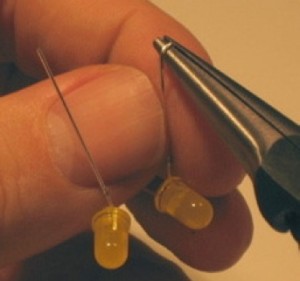 Next you need to make little loops to the ends of the positive leads. With the pliers, grab the end of one of the positive leads and give it a twist in the outward direction, to make a small loop:
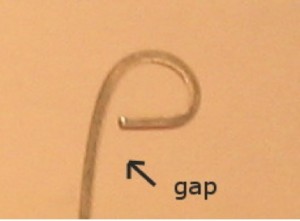 Don’t close the loop completely, leave a small gap:
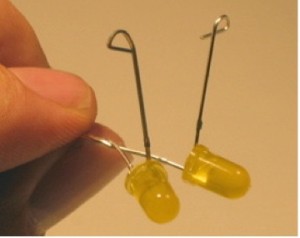 Now create a loop on the other lead in the same manner, twisting it in the opposite direction. Here’s what the completed “eyes” should look like.
Step 2. Making the Antennae
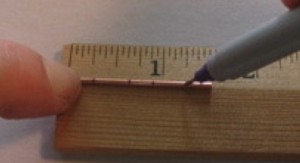 Take one of those little copper tubes, your ruler and a permanent marker. Mark the tube at the following measurements: • 5mm • 15mm • 20mm • 30mm. (sorry our ruler is in imperial!)
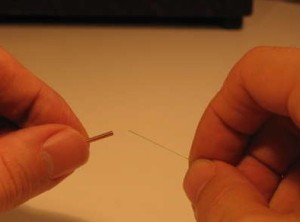 Take the spool of music wire (the flexible thin wire), and cut a 330mm length using your wire cutters. Now insert the music wire into the copper tube: Slide the tube about ½ of the way down the length of the wire. Use the ruler to help center it; there should be 14.5mm of wire extending from either end of the tube. (These lengths have been established by trial and error but you may need to adjust depending on thickness of wire)
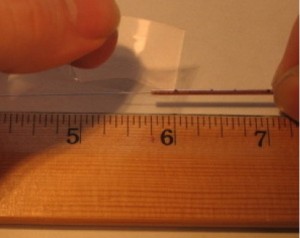 You use a little piece of tape to help keep the wire in place, like so:
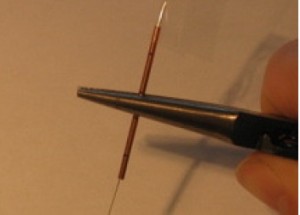 Now, with your needle-nose pliers, grab the copper tube right between the two center-most marks (those at 15mm and 20mm); you should have equal amounts of copper tube and wire extending from either side of the pliers:
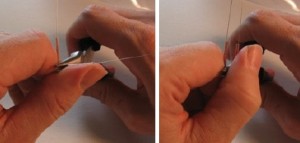 Next, using your thumb while firmly holding the copper tube in place with the pliers, bend each end of the copper tube 90°:
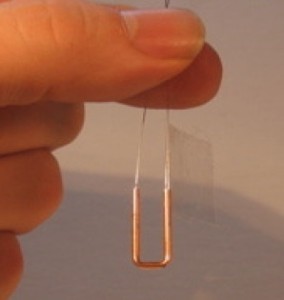 They should be bent in the same direction, so that they are parallel. It should look like this:
If one section of copper tube is slightly longer than the other, don’t worry about it… this is not an exact science! You can now remove the bit of tape.
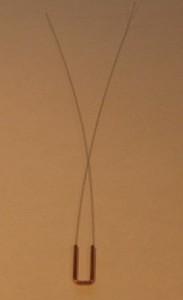 Here is another view of what we have so far (don’t worry if the wires cross like this or not):If one “antenna” is slightly longer than the other, use the wire cutters to even them out.
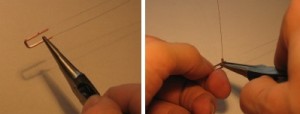 Next, bend each tube 90° at the remaining marks, grabbing the end of the tube with the pliers like so.
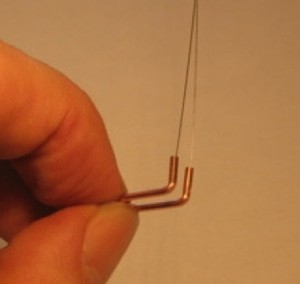 You should have something that looks like this:
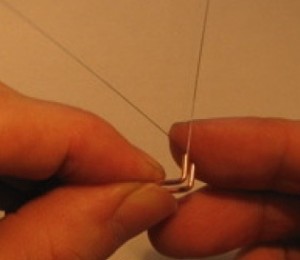 Next you need to bend the music wire where it exits the tube so that it sweeps forward—that is, in the same direction as the bent copper tube. Because this wire is “springy,” you need to really mash it a bit with your finger. Push down firmly on the wire as shown here:
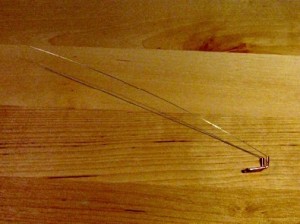 After you do that for each section of wire, it should look like this: As in the photo opposite, the wire should be at slightly less than a 45° angle to the “base” of the copper tube.
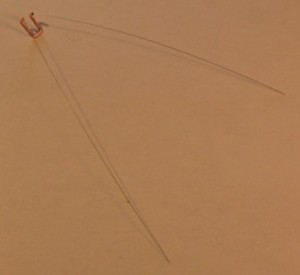 The antennae should spread out “sideways,” creating a roughly 45° angle between them (see opposite). Again, this doesn’t have to be exact at this point… you can fine-tune it later.
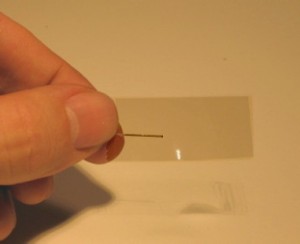 Next, you want to add little flaps to the ends of the antennae; this will make it far more sensitive to light breezes. Tear off a 1 ½” strip of cellophane tape, and stick it on the end of one of the antennae so that the end of the wire extends about half-way down the length of the tape:
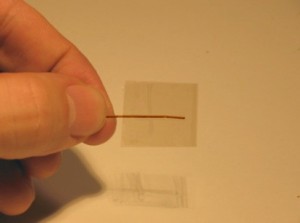 Now fold the bit of tape that extends past the wire back over the wire so that the tape sticks to itself. You should now have a little squareish tab of tape on the end of the wire, without too much (or any) of the sticky side exposed:
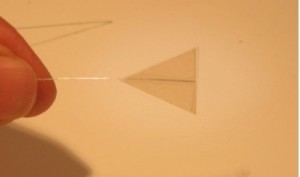 Finally, trim the tab down to a triangle shape with a pair of scissors: You should have something that looks like this: Do the same for the other antenna.
Step 3. Assemble Antennae and Eyes
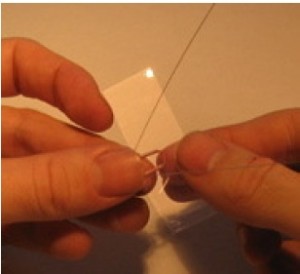 Take a watch battery (one of the coin-shaped ones). Notice that one side has writing on it—in particular, notice the “+” sign. This is the positive side of the battery, and the flip-side, with no writing, is the negative side… this will be important later! Put the battery aside for now, and tear a strip of cellophane tape about 50mm in length. Lay this strip of tape across the “base” of the antennae assembly, so that tape “wings” of equal length extend in either direction:
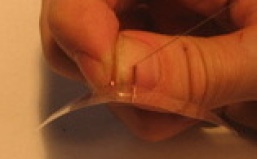 Another view: In the photo opposite, the tape is on top of the base of the copper tube, with the sticky side down. Next, lay this antennae/tape assembly on top of the positive side of the battery:
 Use your fingers to work the tape into the nooks and crannies around the copper tube, but let the tape wings to continue to extend of either side of the battery.
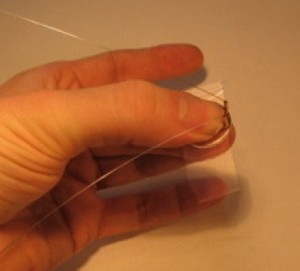 Now take the LED eye assembly. The twistedtogether LED leads will be taped to the negative side of the battery, with the eyes facing forward—the same direction the antennae are pointing, with the looped LED leads extending up toward the antennae.
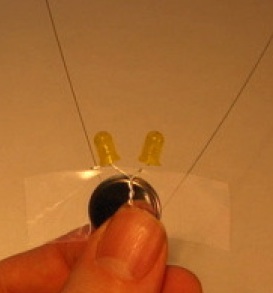 Take a look at the next few photos before taping anything into place to make sure this is clear…
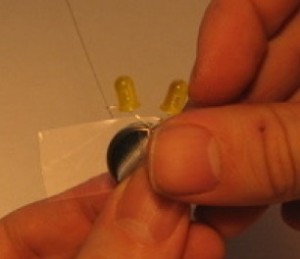 Now wrap each tape wing around the bottom (negative) side of the battery, firmly taping the twisted LED leads in place:
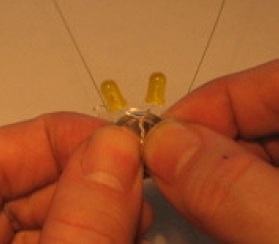 Again, work the tape into the nooks and crannies so that everything is held firmly in place:
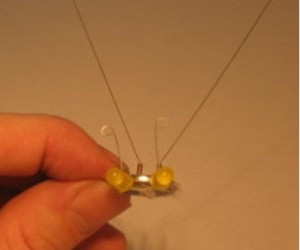 You should now have something that looks like this:
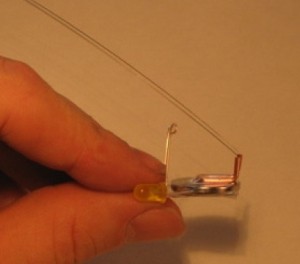 Here’s a side view: If something doesn’t seem quite right, don’t worry… just carefully peel off the tape and try again.
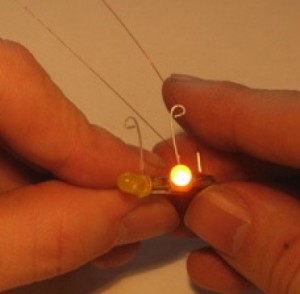 Now it’s important that you test your blinkybug. Gently bend one of the antennae wire (don’t crimp it) so that it touches one of the looped LED leads; that LED should turn on. Do the same for each LED: If they turn on… great. If not, there are a few things to try:
- Re-tape. Sometimes just un-taping the eyes and antennae from the battery and re-taping will do the trick.
- Look for short-circuits. Are the negative (twisted) LED leads touching the edge of the battery? The positive side of the battery extends onto the edges so you have to be careful with this. A bit of adjusting or re-taping should do the trick.
- LEDs are “backwards.” Perhaps there was a mixup somewhere and the positive and negative LED leads of the eye assembly are reversed. There is an easy solution to this: just flip the battery over, and treat the positive side as the negative, and vice versa.
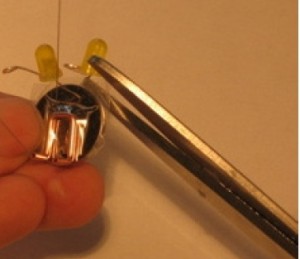 Once it’s all taped up and working, you can trim of the extra tape bits with a pair of scissors:
Put the LED / battery / antennae assembly to one side whilst you make the legs.
Step 4. Attaching the Legs
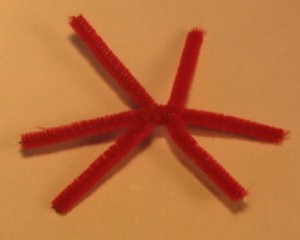 Take a pipe cleaner (mine were 300 mm) and with your wire cutters cut into 3 x 100mm lengths. Hold all three pieces at their mid-section (150mm) and spread them out a bit then give them a few twists at the mid section, so that you have a star-shaped thing, like this:
Each “leg” should be about the same length… but close enough is good for now!
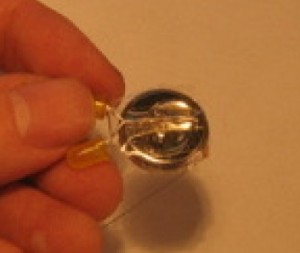 Have your glue / glue dots /glue gun and your pipe-cleaner leg assembly close at hand. Now pick up the LED/battery/antennae assembly by the LEDs and flip it upside-down so that you’re looking at the negative side of the battery, where the twisted LED leads are taped. Now with your other hand, stick a glue dot or carefully squeeze about a pea-sized glob of glue onto the bottom of the battery.
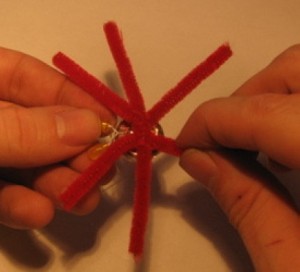 Now pick up the leg assembly and carefully place it onto the battery so that the point at which the pipe cleaners are twisted together meets the glob of glue.
Try not to touch the glue… you may want to use the end of a pen or something similar to press the centre of the leg assembly into the glue.
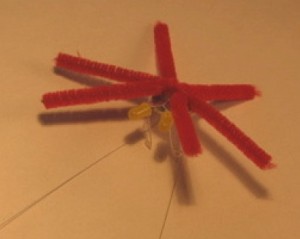 Hold this carefully in place for about 30 seconds. You should then gently set the whole thing down, upside-down, as seen here:
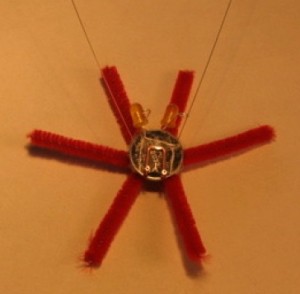 Give it a couple minutes to finish setting, then give the legs a little wiggle… if they still seem a bit loose, carefully add a bit more glue where the legs meet the battery, and let it set again. You should now have something that looks like this:
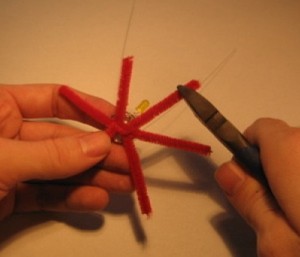 If the legs seem uneven, you can trim them with wire clippers:
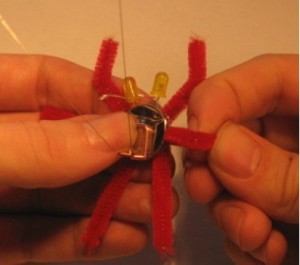 You can now bend the legs into the fun buglike pose of your liking:
Step 5. Aligning the Antennae
This is the fiddliest part … but first, a brief explanation of how Blinkybugs work: When your bug is complete, the antenna wire will pass through the little loops at the end of the LED leads. When the bug is sitting there undisturbed, the antennae should pass through the loops without touching the sides. As this part of the bug acts like a switch, the eyes will be off. However, when something makes the antennae move, they will tap against the loops, letting power from the battery flow to the LEDs and causing them to blink.
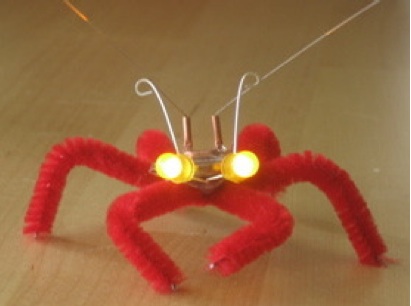
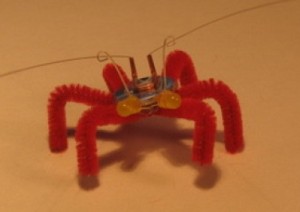 Here is a finished Blinkybug “at rest;” its antennae pass through the loops without touching.
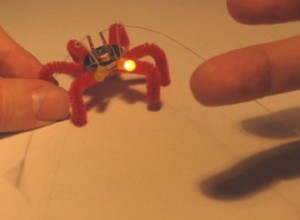 When an antenna is moved slightly, it contacts the loop and turns that eye “on:”
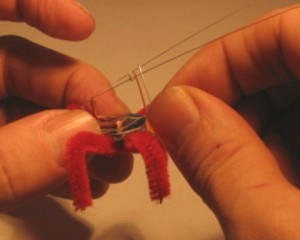
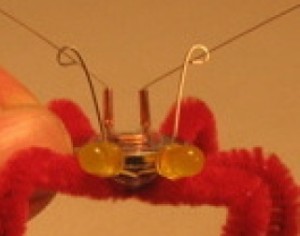 The trick is to precisely align the antenna wire inside the loops. You should have left a small gap in the loops; if not, use the pliers to gently open up each loop just a bit. Now gently pull each antennae wire into each loop. It should look something like this:
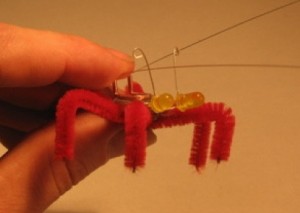 To get everything lined up just right, you will probably need to make some adjustments. If an antenna wire is way off, you can gently squish it where it comes out of the copper tube, as you did earlier (the antenna may need to come out of the loop to do this):
For more fine adjustments, hold the body of the bug while gently positioning the loop by grabbing the LED lens or the lead itself. Getting everything just right requires some patience, so don’t get frustrated… once you get the hang of it, you’ll be able to adjust your bug so its eyes blink on only when the antennae move. Congratulations! You now have a working Blinkybug… enjoy!
Step 6: Taking Care of Your Blinkybug
Blinkybugs are delicate and need to be handled carefully. However if you take good care of it and keep it adjusted so that its eyes are not stuck “on,” it should last a long time.
Disabling Your Bug
If you ever need to pack up your bug, it’s a good idea to temporarily disable it so that it does not get stuck “on” and drain its battery. Here is one way to do this:
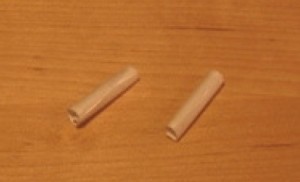 Cut 2 x 20 mm-square pieces of paper and using a bit of tape, roll them into little tubes about 5mm in diameter:
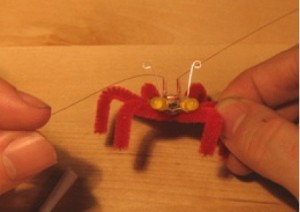 Gently pull each antenna out of its loop through the gap (opening up the gap if necessary):
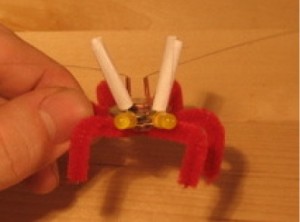 Slip each tube over each looped antenna lead. Your Blinkybug, which now appears to be wearing a little hat, will not blink, as the paper acts as an insulator between the wire and the LED leads. You can now carefully roll up your blinkybug in a piece of newspaper or bubble wrap, and pack it in a box. Make sure it has enough room so that the antennae don’t have to bend too much.



 English
 Nederlands
 Deutsch
 Italiano
 Español
 Português
 Română
 Cymraeg
No comments yet.